
|
|

|
|
|
|
|
|
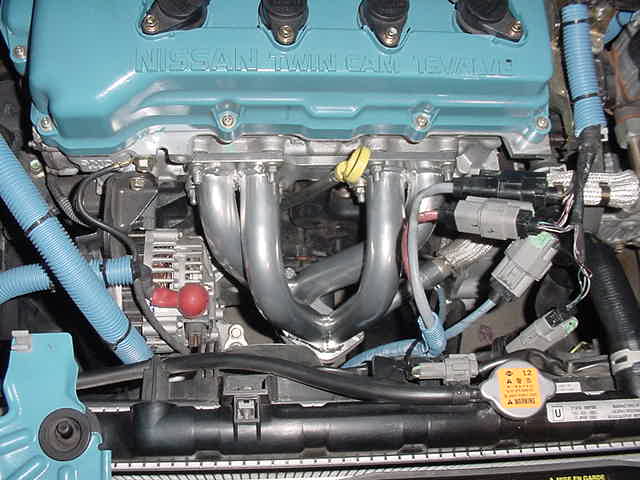
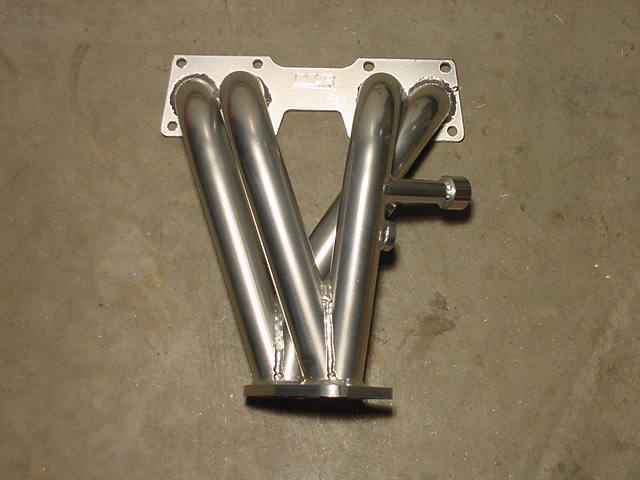
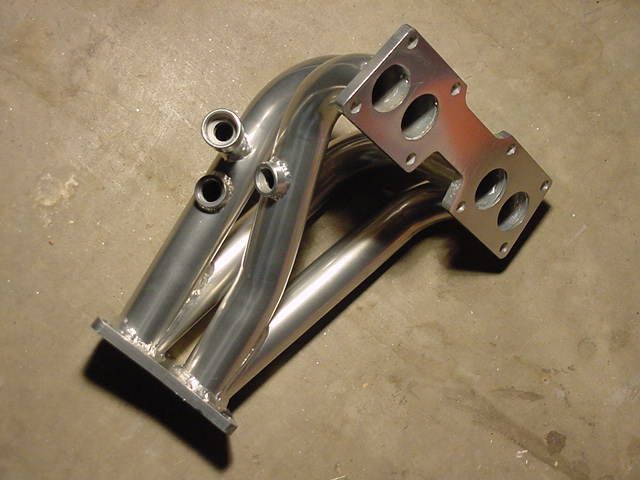
Finally one of the prayers for the B15 GXE/XE owners have been answered. Hotshot Performance has stepped up to the plate to develop a header setup for the QG18DE equipped Sentra. After donating our test B15 for a week at HS, a prototype header assembly (and CAI) was developed. The stock header and piping are very similar to the GA16DE's stock setup. Currently the only header for the QG18DE on the market is by Hotshot. This Hotshot header, like every other header that HS makes, is constructed of heavy gauge mild steel that is ceramic coated for a good clean appearance and longer life.
Stock Header vs. HS Header
After removing the stock QG18DE manifold, you could easily tell it wasn't designed for providing maximum power, much like the GA16DE's header design. The QG18DE cat isn't right out of the exhaust port like the GA16DE, so thats not a big concern. But just like the GA16DE, each primary pipe is shared by two cylinders. Once again, this is obviously designed for emissions, not power.
With the HS unit every cylinder gets it's own primary pipe, no more sharing. This is so much better for both back pressure reduction and pulse tuning. You will notice a huge power difference after installation. The car pulled hard in stock trim at low RPM levels, but after installation of the HS unit, the car seemed to pull even harder. The 0-60 time seemed to be a lot quicker as well.
Gaskets
The installation of the Hotshot header was at best a "breeze". Might help if you get another set of hands to help hold things though. Just remember to order a new exhaust manifold gasket before you tear your car apart. The header does come with a new copper secondary gasket, so make sure its there before you do the install. Do not fabricate your own gaskets, as these will most likely get blown out or burn up due to the intense pressure and heat of the exhaust. This will most definitely cause an exhaust leak.
You'll require a long 12 mm socket to remove the bolts holding the header onto the manifold. Short sockets won't reach over the threaded stud. You may want to spray/soak the bolts in WD-40 before trying to remove them. This should help loosen them up a bit before you start cranking on them. Be gentle when removing the bolts, as to not snap a thread. You'll have to have it drilled out of the block and replaced, if you do snap a bolt off the manifold. That can be a pain. On a newer car this really shouldn't happen though.
OBDII
You'll notice that the QG18DE has four O2 sensors that are plugged into the stock header. One on each primary tube (at the top) and one on each tube (at the bottom) before the primary connects to the secondary pipe. You'll need to unplug the sensor connectors (those are the three gray and one black sensor plugs that are located above the stock header heat shield.) before you remove the header from its location.
We suggest you get a marker and number each sensor part (female and male parts) from 1 to 4 before you disconnect them. This will make it a lot easier later on when you need to properly reconnect them later.
O2 Sensors
To remove the O2 sensors from the stock unit, you'll need a 7/8" O2 Sensor Socket. Most car part stores will carry this for about $13-15 bucks. You should use this tool, you do not want to damage the sensor while its still plugged into the stock unit. TRY NOT TO DAMAGED THEM, a replacement OEM sensor will cost you over $100 each. This can be an expensive install if not done with care. We found it a bit easier to remove (and install) these pieces when the header units are not on the car. Weight
After you remove the stock header assembly, you'll notice that the weight of the primary unit is easily over 20lbs. The HS unit is nearly half that. That is a huge weight difference!!!
Dipstick
Installing the HS primary unit requires you to slightly bend your dipstick towards the front of the car. It's a tight fit to get the header over the dipsticks shaft. After you get the header in place, put the bolts back on,..but do not torque them down yet.
EGR
You'll need to thread the EGR pipe to the EGR opening on the HS primary. This can be a pain sometimes, but in our test fit all we had to do was a little bending and it fit fine. Now after the EGR is fully connected, torque the header/manifold bolts down with the 12 mm socket wrench.
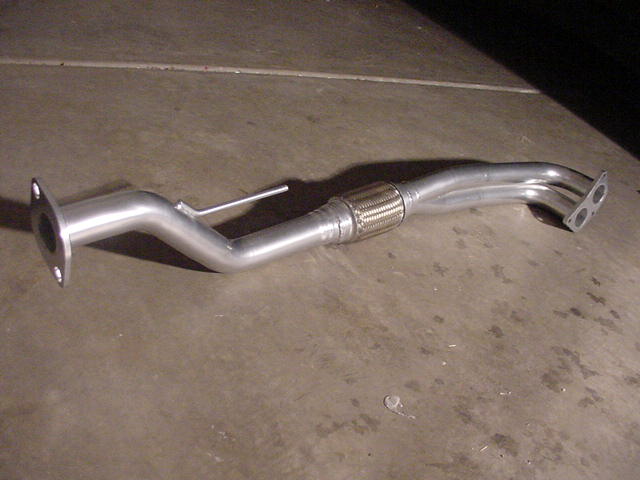
Secondary
Next install the secondary HS pipe in the place of the stock one. This piece, like the primary is a much better looking part then the stock one. Connect each end to the proper place. The rear section will bolt right up to the cat. The studs are already there for you to hook it on. Make sure you insert the hanger in its proper place, otherwise the pipe will hang to low and scrape.
Next you'll want to connect the secondary to the primary by three bolts. Remember to insert your copper gasket in between the primary and secondary before you tighten down the bolts. If you do not replace the gasket, you could have an exhaust leak. Check all of the O2 Sensors to ensure each it tightened and hook up to the upper connectors.
Now everything should be snug and connected. Start it up and check for leaks before you test drive.
http://www.nissanperformancemag.com/december01/projectqg18.shtml
|
|
|